
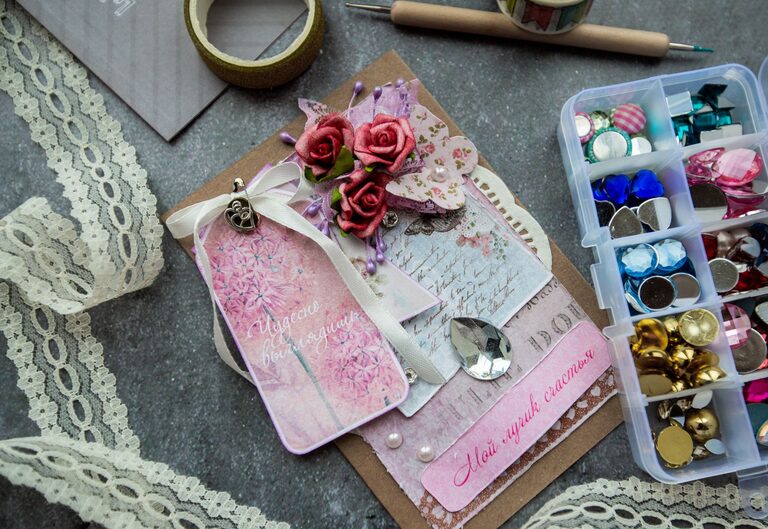
Handmade greeting cards are a simple way to show someone you care. You do not need expensive tools or advanced crafting skills to make a beautiful card. With a few basic supplies, you can create a design that feels personal, thoughtful, and perfect for any occasion.
Whether you are making a birthday card, thank-you note, holiday card, or just-because message, the best designs often include meaningful colors, handwritten words, and small details made by hand. Use the steps below as a starting point, then adapt them to your own style.
Gather Your Supplies
Start by collecting simple craft materials. You may already have many of these items at home.
Basic supplies
– Cardstock or thick paper
– Colored paper or patterned scrapbook paper
– Scissors
– Glue stick or double-sided tape
– Ruler
– Pencil and eraser
– Black pen or fine-tip marker
– Colored pencils, crayons, or markers
Optional decorations
– Stickers
– Washi tape
– Ribbon or twine
– Buttons
– Paper punches
– Rubber stamps and ink
– Craft envelopes
– Glitter or small paper shapes
Choose supplies that are easy to handle and safe for your workspace. If you are crafting with children, use child-friendly scissors and washable markers.
Choose a Card Size and Shape
A standard folded card is easy to make. Begin with a piece of cardstock measuring 8.5 by 11 inches. Fold it in half to create a card that measures 5.5 by 8.5 inches. You can fold it vertically or horizontally, depending on the design you have in mind.
For a smaller card, cut the paper in half before folding. You can also create a square card by trimming the cardstock into a square shape. Keep the card small enough to fit inside an envelope.
Use a ruler and pencil to mark your cutting lines. Lightly score the fold with the back of a butter knife or an empty ballpoint pen. This can help create a neat crease without cutting through the paper.
Plan the Design
Before gluing anything down, arrange the materials on the card. Planning your layout makes it easier to adjust the design and prevents mistakes.
Think about these simple design choices:
– Pick two or three main colors.
– Decide whether the card will have a large focal image or several small details.
– Leave enough open space for a message.
– Place heavier decorations toward the bottom of the card.
– Try to balance the design from side to side.
A simple design can be just as attractive as a detailed one. For example, a white card with a colored paper shape, a handwritten greeting, and a small ribbon may look polished without feeling crowded.
Create a Layered Paper Design
Layering paper is one of the easiest ways to add dimension to a greeting card. Start with a background piece that is slightly smaller than the front of the card. This could be patterned paper, colored cardstock, or a page from a decorative calendar.
Cut a second piece of paper into a smaller rectangle, circle, or other shape. Place it on top of the background layer. You can add a third layer for a message or picture.
Try these ideas:
– Use a dark background with light lettering.
– Stack several circles to make balloons.
– Cut green paper into leaves and add a paper flower.
– Create a small picture frame around a favorite word.
– Tear the edges of paper for a soft, handmade look.
Use a glue stick for flat paper layers. For a raised effect, attach small pieces of folded paper or foam adhesive behind selected shapes. This gives the card depth without requiring special equipment.
Add a Personal Illustration
A hand-drawn image can make a card feel especially personal. You do not need to be an experienced artist. Simple shapes are often enough.
For a birthday card, draw balloons, a cake, or candles. For a thank-you card, try flowers, stars, or a gift box. A holiday card could feature a tree, snowflakes, or a simple wreath.
Start by sketching lightly with a pencil. Once you are happy with the design, trace the lines with a black pen or fine-tip marker. Add color with markers, colored pencils, or crayons.
You can also combine drawing with paper pieces. For example, draw balloon strings and glue paper circles above them. Or draw flower stems and add paper petals.
Make Creative Lettering
The message is an important part of a personalized card. Write it by hand to give the card a warm, personal touch.
If you are unsure about your handwriting, use a pencil to lightly draw guidelines. Write the greeting first, then trace over it with a darker pen. You can also cut letters from colored paper and glue them to the card.
Simple lettering ideas include:
– “Happy Birthday”
– “Thank You”
– “Thinking of You”
– “Congratulations”
– “You Are Amazing”
– “With Love”
Mix large and small letters for visual interest, but keep the words easy to read. You can decorate the letters with dots, lines, or tiny stars.
Use Everyday Items as Decorations
Many ordinary household items can become card decorations. Look around your home for materials that have interesting colors or textures.
Some easy ideas include:
– Use magazine pages for colorful shapes.
– Cut tissue paper into small squares for a mosaic design.
– Add a strip of fabric as a banner.
– Attach a button to the center of a paper flower.
– Use leftover wrapping paper for a bright background.
– Turn paper bag scraps into simple tags.
– Add a short piece of twine around the front of the card.
If you use fabric, buttons, or other thicker items, make sure the finished card will fit inside the envelope. Very bulky decorations may require extra postage or a larger envelope.
Add an Inside Message
The inside of the card is a chance to include a message that is personal and sincere. Keep it simple and write in your natural voice.
You could include:
– A favorite memory
– A specific reason you appreciate the recipient
– A short wish for their special day
– A funny shared moment
– A few encouraging words
For example, instead of writing only “Happy Birthday,” you might write, “I hope your day is filled with all your favorite things. I am so glad to celebrate you!”
Leave a little space between the greeting and the message so the inside feels neat and easy to read.
Finish and Check the Card
Once all the pieces are attached, let the glue dry completely. Then check the card from front to back.
Make sure:
– The decorations are firmly attached.
– The fold is clean.
– The message is easy to read.
– No glue has spread beyond the paper.
– The card fits inside the envelope.
– The envelope is labeled correctly.
If you want to protect the card, place it in a clear sleeve or larger envelope. Store finished cards flat in a dry place until you are ready to give them.
Make Each Card Personal
The most important part of a handmade greeting card is the thought behind it. Include the recipient’s favorite color, a reference to a shared memory, or a design connected to their interests. Even a small detail can make the card feel made especially for them.
Start with simple supplies and a basic layout. As you gain confidence, experiment with new shapes, textures, and lettering styles. Handmade cards do not need to be perfect. Their charm comes from the time, creativity, and personal attention you put into making them.