
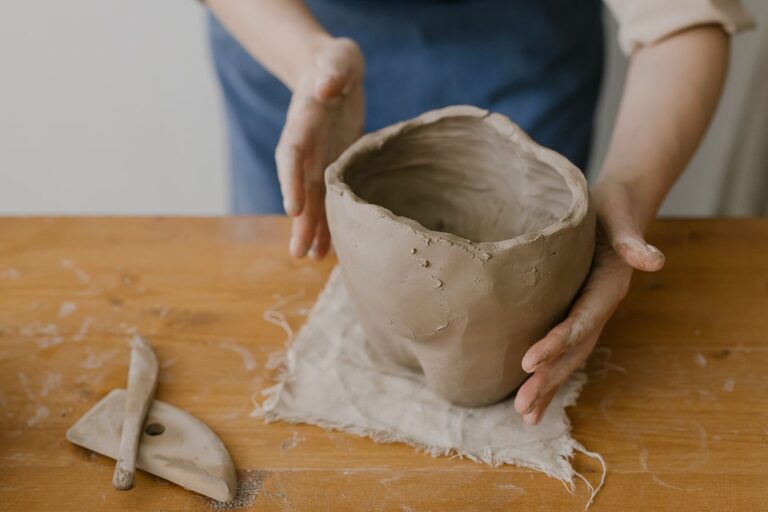
Getting Started With Hand-Building Pottery
Hand-building is one of the easiest ways to begin working with clay. Unlike wheel throwing, it does not require a pottery wheel or advanced equipment. Instead, you shape clay with your hands and a few simple tools.
Through basic hand-building projects, you can learn how clay responds to pressure, how to build sturdy forms, and how to create useful objects. You will also practice important pottery skills such as wedging, joining pieces, smoothing surfaces, and drying clay correctly.
Before you begin, choose a clay that matches your workspace and firing options. Air-dry clay is suitable for decorative projects, while ceramic clay must be fired in a kiln to become durable. If you plan to use ceramic clay, check with a local studio or community pottery center about firing services.
Essential Tools and Materials
You do not need a large collection of tools to start. Gather the following supplies:
– Clay suitable for your chosen project
– A smooth work surface
– A small bowl of water
– A wooden modeling tool or craft stick
– A needle tool or toothpick
– A rolling pin or clay roller
– A sponge
– A kitchen knife used only for craft work
– Canvas, parchment, or a similar nonstick surface
– A damp cloth or plastic sheet for covering clay
Keep your tools clean and use water sparingly. Too much water can make clay soft and difficult to handle. A sponge with a small amount of water is usually enough to smooth rough areas.
Prepare the Clay
Clay often contains air pockets that can cause problems during firing. Potters usually prepare clay by wedging, a process that presses and folds the clay to create an even texture. It also helps remove trapped air.
To wedge clay:
- Cut off a manageable amount.
- Press the clay forward and down with the palms of your hands.
- Fold it back toward you.
- Turn it slightly and repeat the process.
- Continue for several minutes until the clay feels smooth and consistent.
If you are using air-dry clay, follow the instructions on the package. Some types do not require wedging, but they still benefit from gentle kneading before use.
Project One: A Pinch Pot
A pinch pot is one of the best beginner projects because it teaches you how to control thickness and shape with your fingers.
Steps
- Start with a ball of clay about the size of an orange.
- Press your thumb into the center, stopping before reaching the bottom.
- Rotate the clay while gently pinching the walls between your thumb and fingers.
- Continue around the pot until the walls are evenly thick.
- Shape the opening into a circle, oval, or organic form.
- Smooth the inside and outside with your fingers or a damp sponge.
- Place the pot on a flat surface and check that the base is stable.
Try to keep the walls around one-quarter inch thick. Walls that are too thin may crack or collapse, while walls that are too thick may dry unevenly.
A pinch pot can become a small bowl, a ring dish, or a decorative container. You can also press patterns into the surface using leaves, fabric, stamps, or textured objects.
Project Two: A Coil-Built Bowl
Coil building uses long ropes of clay to create taller or wider forms. This technique helps you understand how individual pieces can be joined into a strong structure.
Steps
- Roll several even clay ropes on your work surface.
- Begin with a small pinch pot or a flat clay base.
- Place one coil around the edge of the base.
- Score both surfaces with a needle tool or fork.
- Add a thin layer of clay slip, which is clay mixed with water.
- Press the coil gently into place.
- Blend the inside seam with your finger or a modeling tool.
- Add more coils, one at a time, until the bowl reaches the desired height.
- Smooth the outside or leave some coils visible for texture.
- Shape the rim and allow the bowl to dry slowly.
Scoring and adding slip creates a stronger connection between pieces. This process is often called score and slip. Always blend or firmly press joined areas so the coils do not separate as the clay dries.
You can make the bowl wider by placing each coil slightly outward. To create a narrower form, place the coils closer to the center.
Project Three: A Slab-Built Tray
Slab building involves rolling clay into flat sheets. It is useful for making trays, tiles, boxes, and other objects with straight or gently curved sides.
Steps
- Roll clay into an even slab using a rolling pin or clay roller.
- Turn the clay several times as you roll to prevent sticking.
- Cut a rectangle or square for the base.
- Cut additional strips for the sides.
- Score and apply slip to each joining edge.
- Press the sides onto the base and support them with small clay coils.
- Smooth the seams on the inside and outside.
- Add handles, feet, or simple surface designs.
- Check that the tray sits flat before drying.
For an even slab, place two thin guides of equal height beside the clay. Roll over the guides so the clay reaches a consistent thickness.
Avoid making sharp inside corners if you are new to pottery. Slightly rounded corners are easier to join and less likely to crack.
Add Texture and Simple Details
Surface decoration can make a basic project feel personal. Add texture while the clay is still soft but firm enough to hold marks.
Try these techniques:
– Press fabric or lace into the surface.
– Carve lines with a wooden tool.
– Add small shapes made from leftover clay.
– Use a sponge to create a soft, mottled effect.
– Impress leaves, shells, or other textured objects.
– Draw simple patterns with a needle tool.
Keep decorations attached firmly. Score and slip raised pieces before pressing them onto the surface. Avoid adding very thick details, which may dry at a different rate from the main form.
Drying and Finishing Your Work
Drying is an important part of pottery. Place your project on a flat surface and cover it loosely with plastic. This slows the drying process and reduces the chance of cracks.
Turn the piece occasionally so air reaches all sides. Depending on its size and the type of clay, it may take several days to dry completely. The clay should feel dry and room temperature before it is fired or painted.
Ceramic pieces require kiln firing according to the clay manufacturer’s instructions. Do not place ceramic clay in a household oven. Air-dry clay can usually be painted after it has fully hardened. Use acrylic paint and finish with a suitable sealer if you want added protection.
Common Beginner Mistakes
A few simple habits can improve your results:
– Keep clay thickness as even as possible.
– Do not use excessive water.
– Join pieces carefully with score and slip.
– Dry projects slowly and evenly.
– Support tall or thin walls while building.
– Avoid making forms too large for your clay type.
– Let each project dry fully before finishing it.
Your first pieces may have uneven edges, small cracks, or unexpected shapes. These are useful learning opportunities. Pay attention to what worked, make notes, and try the project again with one small adjustment.
Continue Practicing
Once you are comfortable with pinch pots, coils, and slabs, combine the techniques. Add a coil handle to a pinch pot, build a slab box with a textured lid, or create a set of small dishes with different surface patterns.
Hand-building pottery rewards patience and experimentation. By practicing basic forms and learning how clay behaves, you can develop a strong foundation for more advanced ceramic projects. Start with a simple shape, work slowly, and enjoy the process of turning a soft lump of clay into something useful or decorative.